Track Business Process Flow Stages from Main View
- vikashsingh01
- Jul 19, 2024
- 5 min read
Updated: Apr 19, 2025
Table of Contents:
Abbreviations:
BPF = Business Process Flow
MDA = Model-Driven App
The Problem:
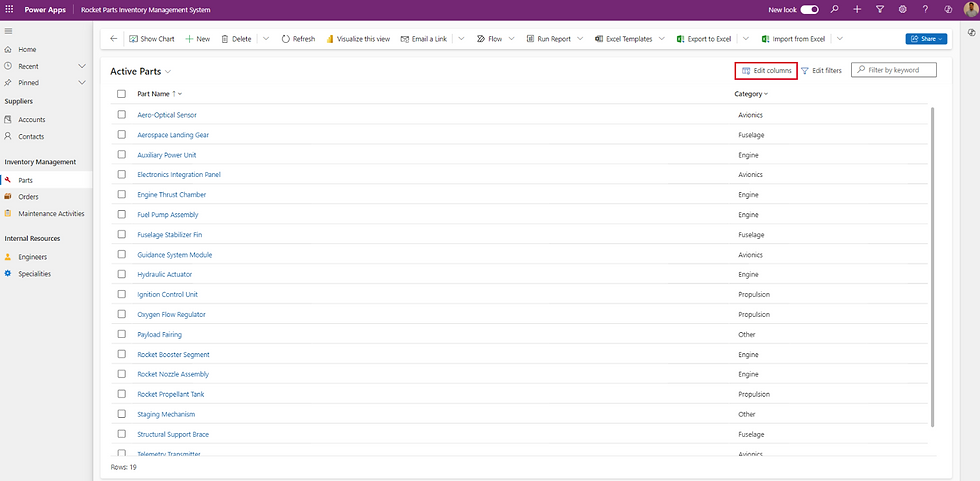
Imagine trying to keep track of dozens or even hundreds of items, whether they’re Projects, Orders, or any other type of record, and you need to manually navigate to each form just to figure out where in the BPF (i.e. what stage) each record is at. It’s like trying to remember where you were in a book by flipping through every page. Not exactly the most thrilling way to spend your day!
Take the below image - I have absolutely no way of knowing where in the BPF any of these records are at without navigating to the main form:

To my surprise, implementing a solution which allows this is not only easy to set up but offers a multitude of benefits:
🌐 Quick Visibility: Quickly see current stages of records straight from views rather than needing to dive into the forms of individual records and easily identity delays or inefficiencies of processes.
📊 Ease of Reporting: For whatever reason, the BPF Dataverse table is extremely hard to access, and working with the data in it is even harder - this solution removes the reliance on this table and offers us this data in an easy format to then be used in MDA charts/dashboards, Power BI etc.
☁️ Forecasting and Planning: Visibility into the current distribution of records across various BPF stages supports more accurate forecasting and effective resource planning by management.
End Result:

💡 Tip: Click on the GIF to enlarge it.
Step 1 - Create a BPF:
If you already have a BPF set up for your table then skip to Step 2.
This post will assume you know the basics of creating a BPF and is why the steps here are very brief. If you are unfamiliar with creating BPFs, here is a useful resource I’d recommend: Your guide to building Business Process Flows like an Expert 😎 - YouTube
Firstly, let’s set up a BPF for our table. We can create BPFs within a solution like this:
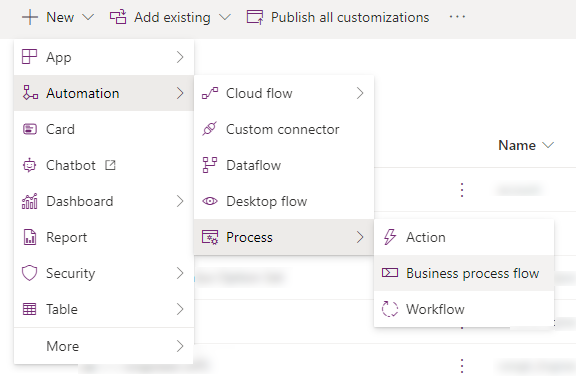
Next is to create your stages. In my BPF I have four stages, but this will work no matter how many stages your BPF has:
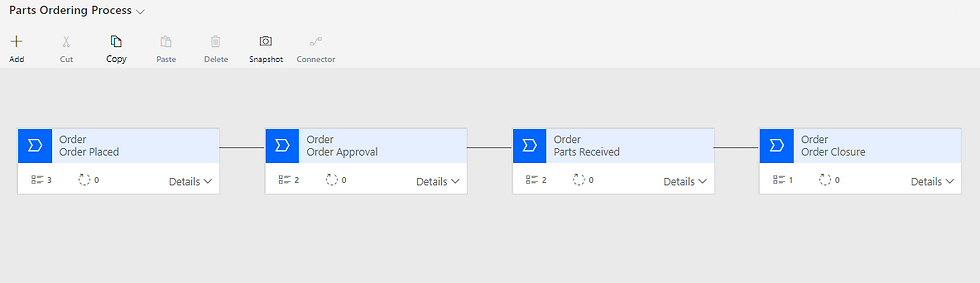
I am using 4 stages here of:
Order Placed
Order Approval
Parts Received
Order Closure
In the top-right of the BPF editor you’ll see this command bar:

Follow these steps:
Save
Validate - This will check for any errors e.g. having a data step which hasn’t been set to a column.
Activate - This is what makes your BPF finally appear in your MDA where this table is being created.
Now when you go back to your MDA, any new records you create will have now have the BPF applied:
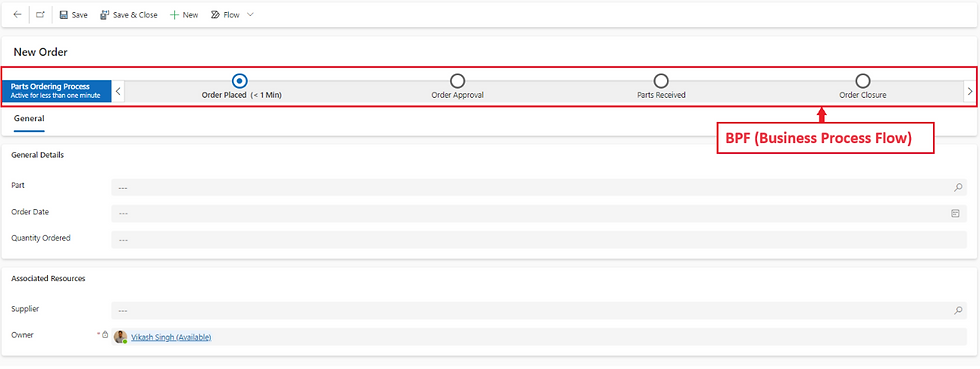
💡 Note: BPFs only apply to records that are created after the BPF is activated. Records that existed before the BPF was activated will not include the BPF.
Step 2 - Create a Choice Column:
Navigate to the table which you created your BPF for and create a Choice column, it can be done from two different places as shown below:

This new column can be called anything, but make sure the data type is Choice:
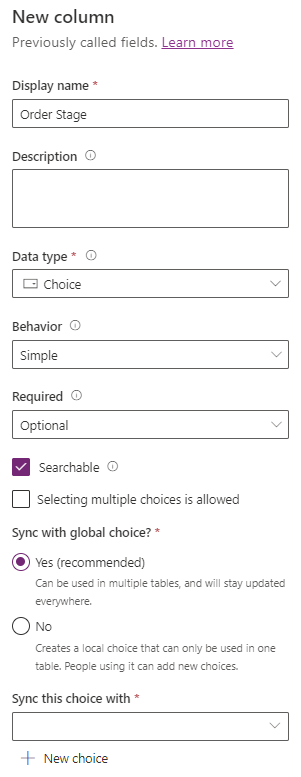
Click the button that says New choice - this will allow you to create a set of options for your Choice column:
I like to use the naming convention of “[Column Name] Option Set” for my set of options (Option Set was the old name for Choice columns in Dataverse), but that is just a suggestion and not a requirement:
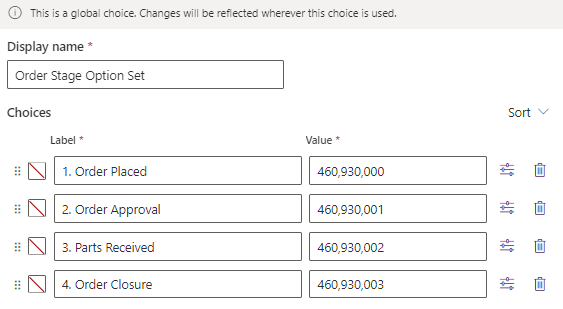
The important part comes in the set of options. Notice how these have the same names as the stages in my BPF - do the same thing but for the corresponding names of stages of your BPF.
💡 Tip: You do not have to prefix these numbers with “1. ”, “2. ” etc. but this will allow you to easily sort views by name ascending/descending.
Click the Save button to create your column, and then add it to your form as read-only:

Optional: You can add this newly created Choice column to the main view or create a new view and put it there if it is important to always see this column. However, columns can always be added to any view manually using the Edit columns if you choose to not do this step.
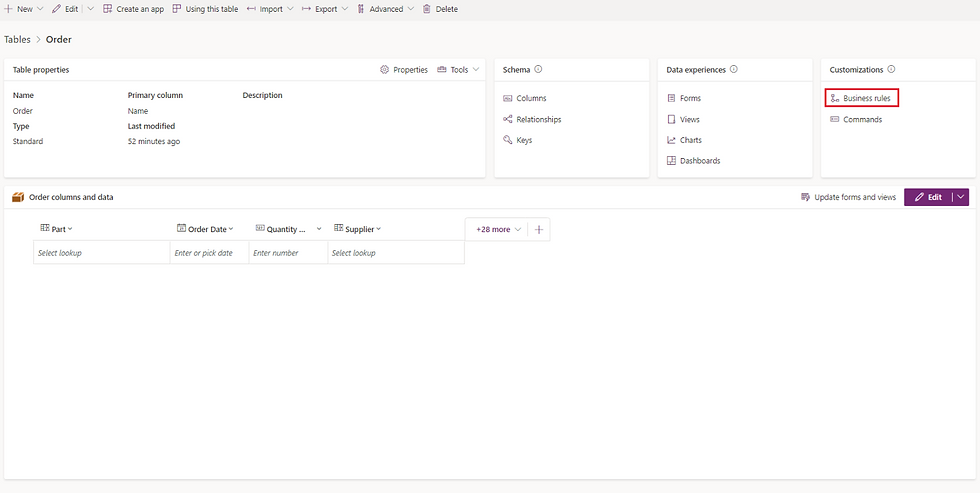
Step 3 - Create a Business Rule:
Create a business rule on the same table you created the BPF/Choice column for:
When you are in the business rule editor, be sure to give it an intuitive name and description. If AI hasn’t made us all redundant and we still have our jobs in a few years’ time, this is likely to come in handy!
If you can’t see the Name and Description boxes, it’s because you need to click the chevron which is highlighted in red:

Next, change the Scope to All Forms (found in the top-right):
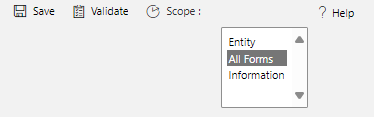
Without doing this, you are unable to reference your BPF in this business rule.
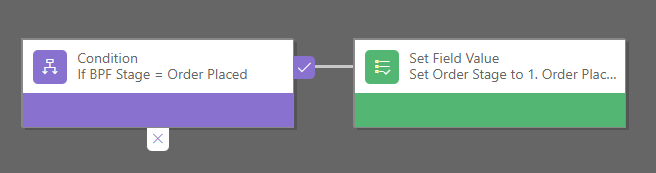
All business rules are created with a single Condition step like this:

Click on the first Condition step and switch to the Properties tab to set the drop downs like so:
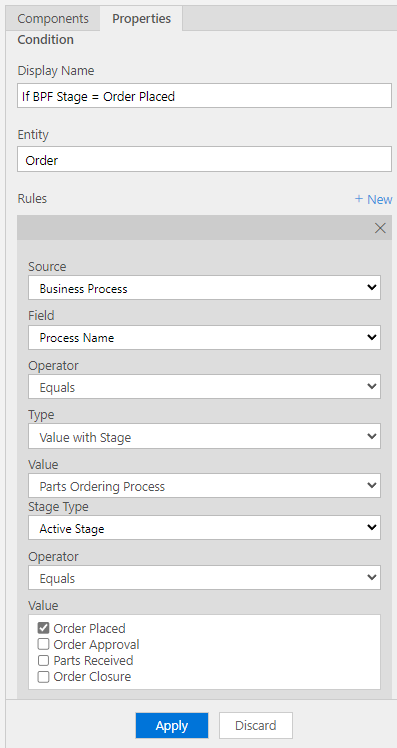
Source = Business Process
Field = Process Name
Operator = Equals
Type = Value with Stage
Value = [The name of your BPF]
Stage Type = Active Stage
Operator = Equals
Value = [The first stage of your BPF]
Don’t forget to hit Apply.
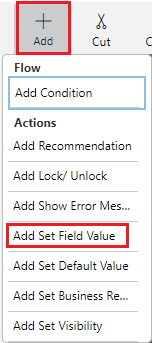
Now add a new Set Field Value step to the true side of the condition:
Click on the Set Field Value step, and set the Properties tab like this:
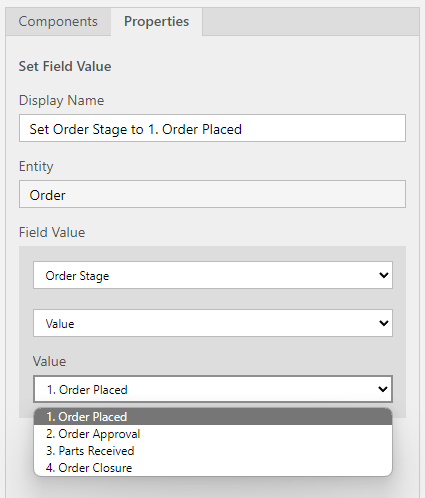
Field = [The name of your Choice column]
Value = [The first choice of the option set]
Don’t forget to hit Apply.
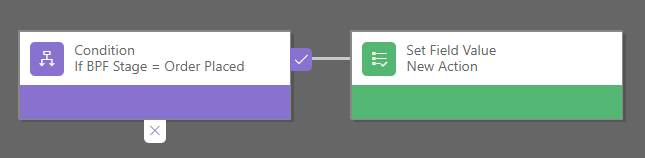
Your BPF should look something like the above image - giving your steps good names really helps!
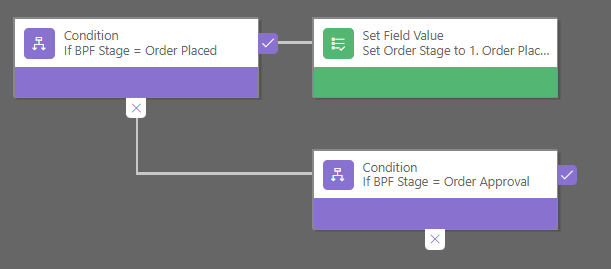
Now we’ll copy (Ctrl+C) the Condition step and paste (Ctrl+V) it into the false path of the Condition:
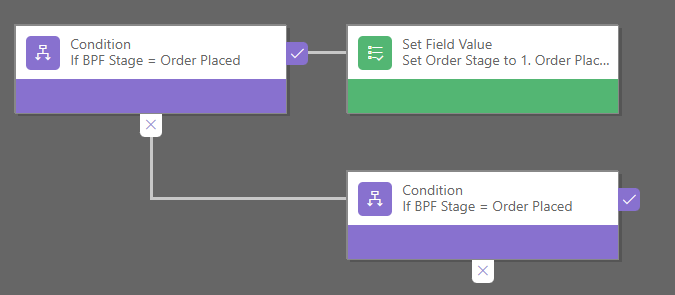
But for this new condition step, we just need to make sure we’re changing the Display Name and Value to the next stage in the BPF accordingly:

Don’t forget to hit Apply.
Now copy the Set Field Value step and paste it on the true path of the second Condition:
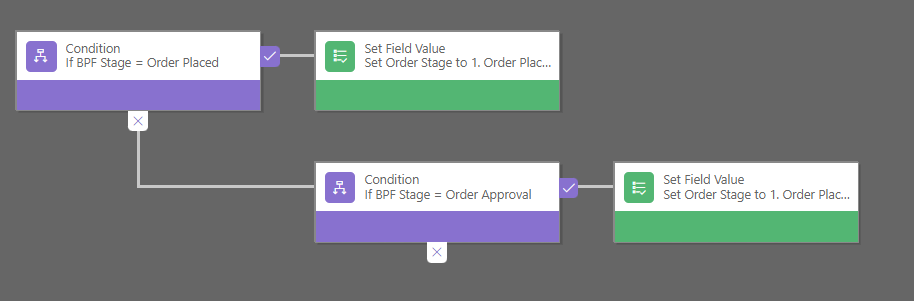
And likewise here, we need to remember to change the values in the Properties tab accordingly:

Don’t forget to hit Apply.

And it will just be a simple rinse and repeat process for however many stages are in your BPF. My BPF had 4 stages, which means my business rule will end up with 4 Conditions and 4 Set Field Value steps.
💡 Tip: Don’t forget that when creating business rules with many steps use Ctrl+C and Ctrl+V - they are your best tool here to expedite business rule configuration.
Your finished business rule should looks a little something like this:

Lastly, and similarly to when we created the BPF, we need to Save, Validate and Activate the business rule (found in the top-right of the editor):

And now we can track the BPF stages for all records in a table:
💡 Bonus Note: This is actually a solution which can be used to fix Issue 4 of the Sales Pipeline chart in D365 Sales.
If you spot any inaccuracies or have suggestions for improvement, please don’t hesitate to reach out. Either leave a comment or feel free to message me on LinkedIn - your contributions will help to make these posts better and improve readability for future readers.


Comments